


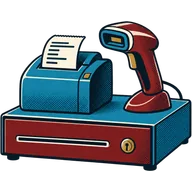
At the end of this article your front desk will print receipts, pop the cash drawer on cash sales, and scan barcodes straight into the POS. You will also open and close a cash register session so the drawer count matches the day’s sales.
Before you start
- A receipt layout is set up. See Business settings: currency, tax rates and receipt details.
- Products have barcodes. See Add retail products, barcodes and stock.
- Your hardware: a thermal receipt printer (USB, network or Bluetooth), a cash drawer with an RJ11 cable to the printer, and a barcode scanner. See hardware for what works.
- The printer’s driver installed on the computer, or the printer connected to the same Wi-Fi as your tablet.
Steps
- Connect the printer to the device. Plug in USB, or connect the printer to your shop network and note its IP address from the self-test printout. Print a test page from the device’s own settings first.
- Plug the drawer into the printer. Use the cable from the drawer into the printer’s drawer port (often labelled DK).
- Add the printer in getbarberpos. Go to Settings → Receipt printers → Add. Name it (“Front desk”), pick the connection type and, for a network printer, type the IP address and port. Set paper width to match your rolls.
- Link the printer to your location. Go to Settings → Business locations, edit your shop and pick this printer for receipts.
- Turn on drawer kick. In the printer settings, enable opening the cash drawer on print. On browser-based printing, check the driver settings on your computer for the same option.
- Plug in the scanner. Plug it in by USB or pair it by Bluetooth. Open POS, click the product search box and scan any product. It should land on the ticket.
- Open a cash register. In POS, you will be asked to open the register. Count the float in the drawer and enter it.
- Run a test sale. Add a product, take cash, and finish. The receipt should print and the drawer should open.
- Close the register at night. Click Close register, count cash, card slips and other methods, and enter them. The end-of-day report shows any difference.
- Set up labels if you have a label printer. Use Products → Print labels and pick a label size that matches your rolls.
Common mistakes
- Testing from getbarberpos before the device can print. If a test page does not print from the device itself, the browser cannot print either.
- Drawer plugged into the computer instead of the printer. Most drawers need the printer to kick them open.
- Wrong paper width. The receipt prints cut off or tiny.
- Scanning with the cursor in the wrong box. Click into the POS search field first.
- Never closing the register. Without a close, you cannot see if the drawer is over or short.
Next step
Bring your existing clients and products across: Import clients and products from another app.